
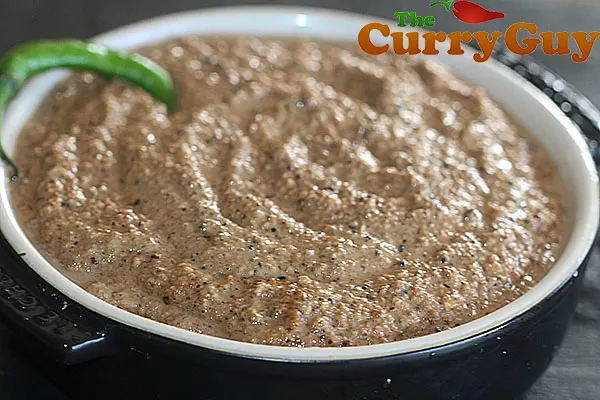
Peanut chutney is the perfect side for so many South Indian dishes.
If you are a big dosa fan like me, you probably already know all about peanut chutney. Peanut chutney is a traditional side dish for dosas, idis, vada, or uttapam. It adds a nutty, spicy, and tangy flavour that complements the dishes beautifully.
Additionally, peanut chutney can also be used as a spread for sandwiches or as a dip for other snacks. In the recipe card below, you will learn to make one of the best peanut chutneys on the planet. I promise!

Peanut chutney
About this peanut chutney recipe.
Just after I learned to make dosas, I wanted to learn all the popular dips that you can serve with them. Dosas are difficult to make at first but with a little practice, you can cook dosas them like a professional.
That same year I travelled to Goa, while researching recipes for my cookbook The Curry Guy Veggie. Of course with dosas recipes in that book, I knew I needed a few good chutney recipes to feature with them.
Peanut chutney was new to me but I have since learned just how popular it is. This peanut chutney recipe ticks all the flavour boxes: it’s savoury, sweet, spicy and tangy. What’s not to love?
Why should you make this recipe?
If you are going to the trouble of learning to make dosas and idlis, then making a peanut chutney like this will always go well with them.
I tried quite a few versions of peanut chutney while in Goa and had a good idea what goes into them. This recipe works because I did one heck of a lot of experimenting before finally deciding this was it!
What’s more, peanut chutney isn’t just a side for dosas and idlis! You can spread it over toast or dip veggies or crackers in it. You are going to love this!
How spicy is this chutney?
That is up to you. It can be quite spicy. This recipe isn’t very spicy in my opinion but you might find it spicy.
Just add the chilli powder to taste. If not sure, add less. If you know you love spicy chutney, you could add more.
How long can you store peanut chutney in the fridge?
You should be able to store your peanut chutney in the fridge for 5 to 7 days. Wrap it tightly until ready to serve.
Although peanut chutney can be served cold from the fridge, you might prefer to bring it to room temperature before serving.
Can you freeze peanut chutney?
Yes, you can freeze this chutney for longer-term storage. Freezing can help extend the shelf life of the chutney beyond the typical 5 to 7 days it lasts in the refrigerator. Here’s how you can freeze your chutney:
- Allow the peanut chutney to cool down completely to room temperature before freezing. Hot or warm chutney should not be frozen as it can create condensation inside the container, leading to freezer burn or loss of flavor.
- Transfer the peanut chutney to an airtight freezer-safe container or heavy-duty freezer bag. Make sure to leave some space at the top of the container or bag to allow for expansion during freezing.
- Seal the container or bag tightly to prevent air exposure and freezer burn.
- Label the container or bag with the date of freezing to keep track of its freshness.
- Place the sealed container or bag in the freezer, ensuring it’s stored flat to prevent spillage or leakage.
- This chutney can be stored in the freezer for up to 2 to 3 months for optimal quality. While it may still be safe to eat beyond this time, the flavor and texture may deteriorate over time.
When you’re ready to use the frozen peanut chutney, thaw it overnight in the refrigerator or at room temperature for a few hours. Alternatively, you can gently reheat it in a saucepan on the stove or in the microwave, stirring occasionally until heated through.
Keep in mind that freezing may slightly alter the texture of the chutney, but it should still be safe to eat and enjoy.
Step by step photographs.
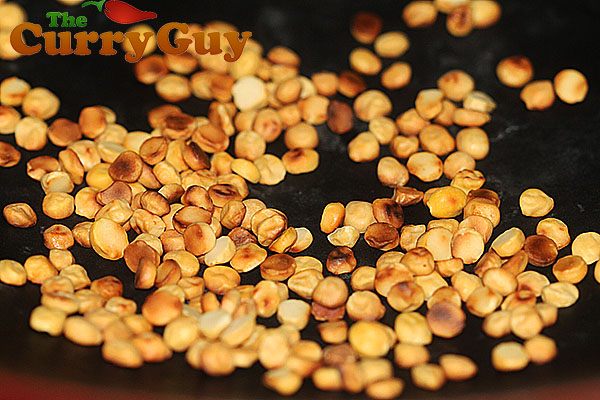
Start by dry roasting your channa dhal. Be careful not to burn them.
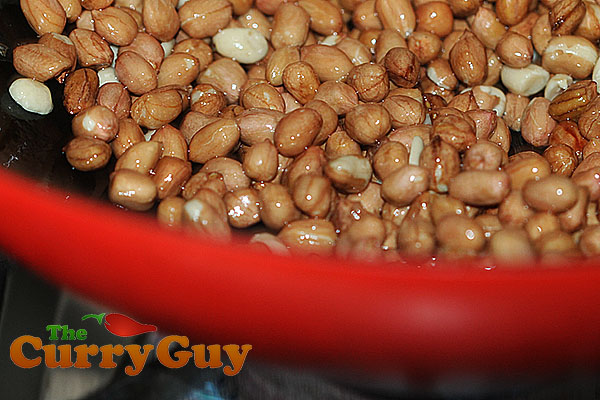
Fry your peanuts in the vegetable oil.
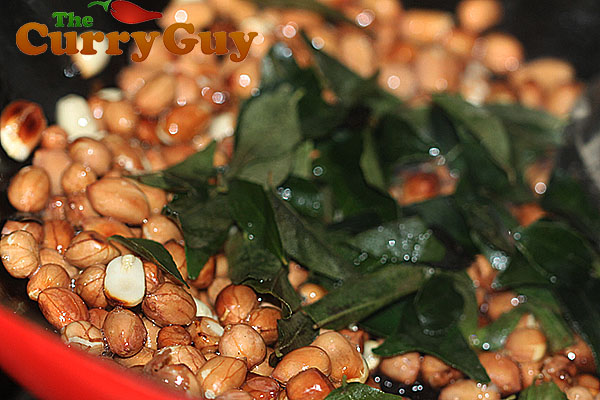
Stir in the fresh curry leaves.
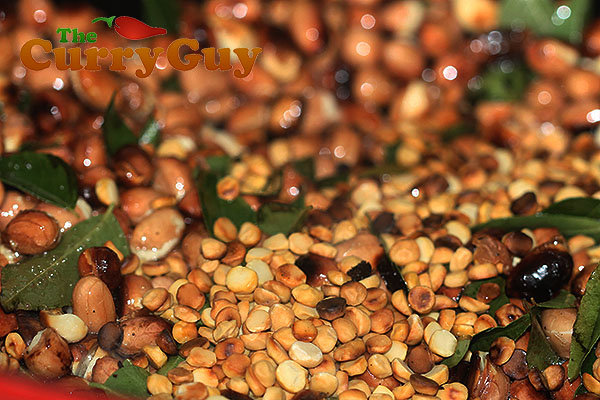
Stir in the channa dhal.
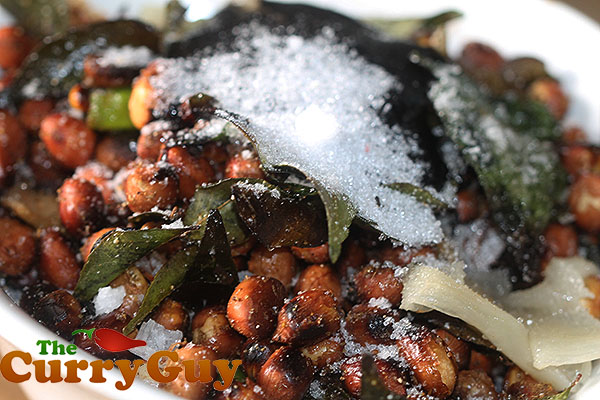
Place all the ingredients in a bowl until cooled. Then blend until smooth.

So good! Give this peanut chutney a try soon.
If you love this peanut chutney recipe, you might like to try some of these too:
Coriander & Coconut Chutney
Tomato Chutney
Coriander & Mint Chutney
Coconut, Tomato & Chilli Chutney
Tomato, Onion & Chilli Chutney
Spicy Coriander Chutney
Garlic Chutney
Have you tried this chutney recipe?
If yes, please give it a star rating in the recipe card below and leave a comment. I love receiving your feedback and I’m sure other readers of my blog do too. Thank you.
If you are not already doing so, please follow me on Instagram and Facebook for all my latest recipes.
Peanut and Tamarind Chutney

Ingredients
- 1/2 cup (100g) raw peanuts
- 2 tbsp coconut oil
- 3 tbsp chana lentils
- 20 curry leaves
- 1 tbsp tamarind concentrate
- 1 tsp amchoor powder (dried mango powder)
- 1 tbsp cumin seeds
- 2.5cm (1 inch ) ginger - finely sliced
- 3 cloves garlic - finely chopped
- 1 tsp Kashmiri chilli powder
- 1 tbsp sugar
- Salt to taste
Instructions
- Start by toasting your chana lentils until lightly browned in a dry frying pan over a medium-high heat. Transfer the lentils to a plate and set aside.
- Now pour your coconut oil into a wok or pan and heat over medium high heat. When hot, pour in your peanuts and stir them into the oil. When they begin to brown, add the curry leaves and stir to combine.
- Now add the roasted channa dhal, garlic, ginger, chilli powder and cumin seeds.
- Allow to sizzle for about a minute and then remove from the heat to cool.
- When cool, place these ingredients in a spice grinder with the tamarind, sugar, citric acid powder and a little salt.
- Blend to a thick paste. You may need to do this in batches depending on the size of your grinder.
- Check for seasoning and serve.
Recommended Products
As an Amazon Associate and member of other affiliate programs, I earn from qualifying purchases.


Nutrition Information:
Yield:
4Serving Size:
1Amount Per Serving: Calories: 103Total Fat: 7gSaturated Fat: 6gTrans Fat: 0gUnsaturated Fat: 1gCholesterol: 0mgSodium: 189mgCarbohydrates: 8gFiber: 1gSugar: 5gProtein: 1g